Are you thinking about switching to solar energy in 2025? If so, you’re in the right place! Solar panel installation can seem intimidating at first, but once you break it down, it’s a process that’s well within reach. Let me guide you through it step by step.
Solar panel installation may seem complicated, but with the right planning and steps, you can make it happen. Whether you’re looking for professional help or thinking of doing it yourself, here’s what you need to know.
I remember when I first decided to install solar panels on my home. It felt overwhelming, but once I understood the process, it became clear—and I’m here to help you feel the same way!
Planning to go solar: What to know before you install panels?
Before you start installing solar panels, it’s important to do some homework. It’s not just about picking the right panels—it’s about ensuring your home is ready for them.
The first step is understanding your energy needs and evaluating if your home is ready for solar installation. From your roof condition to local regulations, planning makes all the difference.
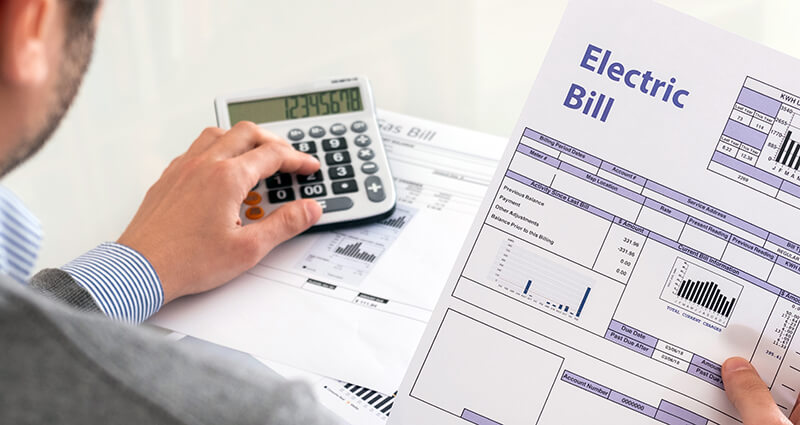
Start by figuring out how much energy you currently use. Check your electricity bills and identify your monthly consumption. Knowing this will help you choose the right size system. Do you know how to calculate your appliances’ monthly electricity usage?
You’ll also want to look into local regulations—some areas require permits or inspections.
And don’t forget to evaluate your roof! Is it sturdy enough for the panels? You want to make sure the structure can handle the weight and that it’s facing the right direction for maximum sun exposure.
The 4 steps of a home solar panel installation
Now that you’ve done the prep work, it’s time to get into the installation. The process might seem like a big project, but trust me, breaking it down makes it easier.
Installing solar panels is easier than you think! Here’s a quick breakdown of the 4 essential steps you’ll follow to get your solar system up and running.
Assessing Your Property for Solar Suitability
Before installing solar panels, you need to evaluate your property’s potential for solar energy generation. Start by examining your roof’s orientation and angle. South-facing roofs typically capture the most sunlight, but east- and west-facing roofs can also work well. Check for any shadows from nearby trees or buildings that might block sunlight during the day.
Next, inspect your roof’s condition. Look for damage, leaks, or structural issues that could interfere with installation. If repairs are needed, address them before proceeding.
Analyze your energy consumption by reviewing past electricity bills. You may like the blog: How to Calculate Electricity Usage?This helps you determine the size and capacity of the solar system you’ll need.
Finally, consider environmental and structural factors. Use the table below to understand key metrics:
| Metric | Description |
|---|---|
| Property Characteristics | Size, topography, and other relevant features of the property. |
| Access to Electricity Grid | Availability and potential need for utility upgrades. |
| Environmental Controls | Nature of environmental and institutional regulations affecting development. |
Obtaining Permits and Approvals
Securing permits and approvals is a crucial step in how solar panel installation works. Local regulations vary, so you’ll need to navigate building codes, zoning laws, and utility requirements. Contact your local permitting office to understand the specific rules in your area.
Be prepared for challenges like lengthy review procedures or unexpected documentation requests. For example, some jurisdictions may require structural analyses to ensure your roof can support the panels. If you live in a historic district, aesthetic considerations might also come into play. Collaborate with your installer to streamline the process and avoid delays.
Designing Your Solar Panel System
Designing your solar panel system involves optimizing its performance for your location and energy needs. Start by choosing the right tilt angle and orientation for your panels. Adjusting these factors can increase energy production by up to 20%.
Consider integrating energy storage solutions, such as lithium-ion batteries, to store excess energy for later use. Advanced monitoring systems can help you track performance and detect inefficiencies. If your property experiences shading, micro-inverters can enhance efficiency by optimizing the output of individual panels.
For snowy climates, steep tilt angles and snow guards can prevent snow buildup and maintain energy generation. Collaborate with your installer to create a system tailored to your property and climate.
You might still want to know:
2.How Long Do Solar Panels Last?
3.The Ultimate Guide to Home Solar Systems
4.How to Choose a Suitable Solar System for My Home?
5. How many watts does a refrigerator use?
Choosing Equipment and Installers
Selecting the right equipment and installers plays a crucial role in ensuring the success of your solar panel system. Begin by evaluating the features of the equipment. Look for panels and inverters with safety features that meet industry standards. Choose reliable products from reputable brands to ensure long-term performance. Compatibility with your installation needs is essential, so verify that the equipment matches your roof type, energy goals, and climate conditions.
When choosing installers, prioritize qualifications and experience. Certified professionals with hands-on expertise deliver better results. Ask about their previous projects and request references to assess their track record.
To simplify your decision-making process, consider the following checklist:
- Equipment Features:
- Safety features that comply with regulations.
- Compatibility with your property’s requirements.
- Reliability and durability from trusted brands.
- Installer Qualifications:
- Certifications from recognized institutions.
- Proven experience with solar panel installations.
- Positive reviews and references from past clients.
You can also consult your installer about warranties and maintenance services. Reliable installers often provide warranties for both equipment and labor, offering peace of mind. Some may even offer monitoring systems to help you track energy production.
By carefully selecting equipment and installers, you set the foundation for a successful solar panel installation. This step ensures your system operates efficiently and delivers the expected benefits for years to come.
How Solar Panel Installation Works

Setting Up Scaffolding
Scaffolding is the first step in the physical installation process. It ensures safety for you and the installation team while working on elevated surfaces. You’ll need to set up scaffolding around the roof area where the solar panels will be installed. This structure provides stable access to the roof and prevents accidental falls.
Safety protocols are critical during this stage. Make sure the scaffolding is securely anchored to the ground and positioned to allow easy movement. If you’re hiring professionals, they will follow industry standards to ensure the scaffolding meets safety requirements.
Tip: Always inspect the scaffolding for stability before starting any work. Loose or improperly assembled scaffolding can lead to accidents.
Installing the Mounting System
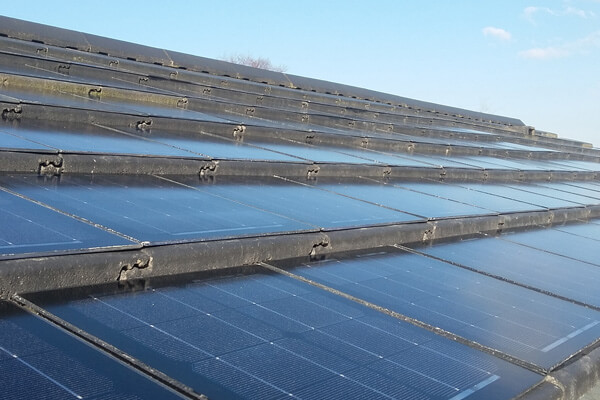
The mounting system is the backbone of your solar panel setup. It secures the panels to your roof and positions them for optimal sunlight exposure. You’ll need to choose a mounting system based on your roof type—flat, sloped, or metal—and the weight of the panels.
Most systems are customized to achieve a 30-degree tilt angle facing south or southwest. This angle maximizes energy production by capturing the most sunlight throughout the day. Roof attachments, module clamps, and mounting rails are key components of the system. Roof attachments are fastened directly to the roof and surrounded by flashing to prevent leaks. Module clamps hold the panels securely, while mounting rails connect the panels to the roof attachments.
| Component | Description |
|---|---|
| Roof Attachments | Fasteners drilled into the roof to secure the racking system, surrounded by flashing to prevent leaks. |
| Module Clamps | Heavy-duty equipment that holds the solar panels in place. |
| Mounting Rails | Rails that support the solar panels and connect them to the roof attachments. |
Mounting systems typically account for about 10% of the total cost of a solar system. For example, a $10,000 solar system would allocate approximately $1,000 to the racking system. Costs vary depending on the type of racking, equipment, and labor required.
Placing and Securing Solar Panels
Once the mounting system is installed, it’s time to place and secure the solar panels. Position the panels to maximize sunlight exposure while avoiding obstructions like trees or buildings. Tools like solar pathfinders and shadow analysis can help you determine the best placement.
Panels are secured using heavy-duty clamps that hold them firmly to the mounting rails. Installation teams follow strict quality control protocols, including pre-installation roof assessments and final system inspections. These steps ensure the panels are securely attached and aligned for optimal performance.
Testing is an essential part of this stage. Voltage testing, current measurement, and solar irradiance measurement validate the system’s performance under different weather conditions. For example:
| Testing Method | Purpose |
|---|---|
| Voltage Testing | To assess the electrical output of the solar panel. |
| Current Measurement | To evaluate the current produced by the panel under specific conditions. |
| Solar Irradiance Measurement | To determine the intensity of sunlight received, crucial for performance evaluation. |
Note: Severe weather conditions can impact solar panel systems. Use FEMA’s National Risk Index to identify weather risks at your site and implement design strategies to enhance resilience.
By following these steps, you’ll ensure your solar panels are securely installed and ready to generate clean energy for years to come.
Wiring the System
Wiring the solar panel system connects all components to ensure efficient energy flow. Begin by linking the solar panels to the inverter using properly sized cables. These cables carry the direct current (DC) generated by the panels. Use high-quality materials to minimize power loss and overheating. Secure the cables with conduit materials that comply with electrical safety standards. This step protects the wiring from environmental damage and ensures long-term reliability.
Next, focus on creating reliable connections. Use connectors designed for solar systems to prevent electrical surges or malfunctions. Grounding the system is equally important. It protects against electrical faults and enhances overall safety. Follow local electrical codes to ensure compliance during this process.
The table below highlights best practices for wiring and their impact on installation reliability:
| Best Practice | Impact on Installation Reliability |
|---|---|
| Properly sized cables | Minimizes power losses and overheating concerns |
| Suitable conduit materials | Enhances safety and compliance with electrical norms |
| Reliable connections | Protects against electrical surges and malfunctions |
| Effective grounding methods | Ensures system performance and reliability |
| Ongoing professional development | Keeps installers updated with industry standards and practices |
Tip: Label all wires clearly during installation. This makes future maintenance and troubleshooting much easier.
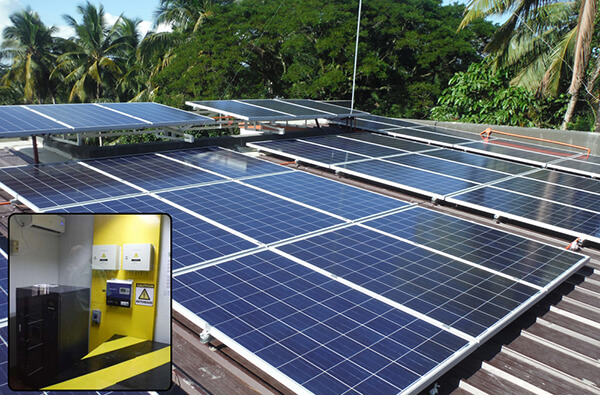
Connecting the Inverter and Battery
The inverter and battery are critical components of your solar panel system. The inverter converts the DC electricity from the panels into alternating current (AC) for household use. The battery stores excess energy for later use, ensuring a consistent power supply.
To connect these components, follow these steps:
- Position the battery close to the inverter. This reduces power loss during energy transfer.
- Use thick cables to connect the battery terminals to the inverter. Thicker cables handle higher currents more effectively.
- Check the inverter manual for any required fuses or circuit breakers. These components protect the system from electrical faults.
The table below outlines the connection process:
| Step | Description |
|---|---|
| 1 | Connect the inverter to the solar panels. |
| 2 | Wire the inverter to the battery storage system. |
| 3 | Connect the inverter to the electrical panel. |
| 4 | Ensure proper wiring and safe configuration. |
Note: Use a charge controller to manage the connection between the panels, inverter, and battery. This device prevents overcharging and extends battery life.
The inverter also monitors the system’s performance. It interacts with the battery to manage energy storage efficiently. Place the inverter in a cool, dry location to avoid overheating and ensure optimal operation.
Testing and Activating the System
Testing and activating the system is the final step in how solar panel installation works. Start by inspecting all connections. Ensure that cables are secure and components are properly grounded. Use a multimeter to measure voltage and current at various points in the system. This verifies that the panels, inverter, and battery are functioning correctly.
Once the initial checks are complete, activate the system. Turn on the inverter and monitor its display for any error messages. Many modern inverters come with built-in monitoring systems. These systems provide real-time data on energy production and consumption.
Testing procedures often include advanced methods to validate system performance. For example:
- Investigating active regions to predict potential issues.
- Using machine learning to assess the effectiveness of system parameters.
- Achieving prediction probabilities of at least 70% for system reliability.
Alert: If you notice any irregularities during testing, consult a professional installer immediately. Addressing issues early prevents long-term damage to the system.
After activation, monitor the system for a few days to ensure stable performance. Regular monitoring helps you identify inefficiencies and optimize energy production.
How to Choose a Suitable Solar System for My Home?
DIY solar panels: Can you install solar panels yourself?
So, you’re wondering if you can handle solar panel installation on your own. It’s tempting, right? But let’s take a closer look before you dive in.
While it’s possible to install solar panels yourself, it’s not for everyone. DIY solar installation can save money but also comes with risks and challenges.
Installing solar panels as a DIY project can seem like an appealing option to cut costs. However, it’s important to know what you’re getting into.
If you’re comfortable with electrical work, roofing, and dealing with local building codes, it might be worth considering. However, if you’re unsure, hiring a professional might save you headaches and ensure the system works as intended.
Pros and Cons of DIY Installation
Before deciding on DIY installation, weigh the advantages and disadvantages carefully. Here’s a breakdown:
Pros of DIY Installation
- Lower Costs: You save on labor fees, which can account for 10–20% of the total installation cost.
- Hands-on Satisfaction: Completing the project yourself can be rewarding and educational.
- Flexible Schedule: You can work at your own pace without coordinating with contractors.
Cons of DIY Installation
- Complexity: Installing solar panels requires knowledge of electrical systems and roofing.
- Risk of Errors: Mistakes can reduce efficiency or cause safety hazards.
- No Warranty on Labor: Manufacturers may void warranties if the system isn’t installed by a certified professional.
Plus, keep in mind that you could face challenges like obtaining permits and passing inspections. Many local authorities also require that installations be done by licensed professionals for warranty and safety reasons.
FAQ
What is the average cost of installing solar panels?
The average cost of installing solar panels ranges from $15,000 to $25,000 for a residential system. Costs depend on system size, equipment quality, and labor. Government incentives or tax credits can reduce this amount significantly.
How long does it take to install solar panels?
A typical residential solar panel installation takes 1 to 3 days. This timeline includes mounting the panels, wiring the system, and connecting it to the grid. Permits and inspections may extend the overall process.
Do solar panels work during cloudy days?
Yes, solar panels generate electricity on cloudy days, though at reduced efficiency. They capture indirect sunlight, producing about 10-25% of their usual output. Advanced panels perform better in low-light conditions.
How often should I clean my solar panels?
Clean your solar panels every 6 to 12 months. Dust, dirt, and debris can block sunlight and reduce efficiency. Use soft brushes or water to clean them safely. Avoid harsh chemicals or abrasive materials.
Can I add more panels to my existing system later?
Yes, you can expand your solar system by adding more panels. Ensure your inverter and electrical setup can handle the additional capacity. Consult your installer to confirm compatibility and avoid system overload.
Tip: Always consult a professional before making changes to your solar panel system. This ensures safety and optimal performance.
Conclusion
Switching to solar is an exciting and rewarding project. With proper planning, the right help, and a clear understanding of the process, you’ll be well on your way to harnessing clean energy for your home.


0 Comments